How To Conceal Dark Circles Under Eyes Like A Pro
Love your flaws and then conceal them. I live by these words completely. My biggest flaw lies in and around the eyes. Dark circles, pigmenta...
https://www.divalikes.com/2017/06/how-to-conceal-dark-circles-under-eyes-like-pro.html
Love your flaws and then conceal them. I live by these words completely. My biggest flaw lies in and around the eyes. Dark circles, pigmentation, fine lines and dryness – you name it and I have it. I have been struggling for a long time now as my pigmentation is genetic (which means I can do nothing about it!) and from the time I have started learning makeup and till today, there has been a lot of difference in the way I used my concealer. Concealing under eyes and doing it like a pro are two different things. After years and years of practice, I can surely vouch for the fact that I have completely mastered the art of concealing heavy dark circles and pigmentation. Doing eye makeup was always my forte I believe, and that is why I kept on experimenting to see what and how it works for me. I wanted to be completely sure and perfect in concealing under eyes and maybe that is why I have waited this long to do this post. I have elaborated as much as I could and all I learned in concealing the under eyes like a pro and brighten it up for any makeup look you want to go for. Read on to know more about it.
Products Used:
I have also listed down the possible and probable dupes of these products.
Before I start off, I would advise investing in good quality products. Firstly because it will give a nice finish and blended look for the whole day without any disruptions. Secondly, the eye area is sensitive and will cause infection if you don't use quality makeup. And lastly, once you invest, it will last a long time (around 1 year easily) and is surely worth it.
Steps Involved:
I started off with L'Oréal Paris White Perfect Magic White Eye Cream which works well for my eye area, hydrates and plumps up the skin and gives a nice and smooth canvas to work with. Wait for few minutes to let the cream get absorbed. You can also use a drop of glycerin and let it get absorbed. Glycerin helps the makeup to stick to the skin better.
I warmed up the Kryolan TV Paint Stick (exactly my skin tone color) and applied on the eyelids. I patted the cream well and spread all over the lids first.
Next, I used the damp Almon Latex Free Pink Blender Sponge to blend the color well. It is very important to blend in evenly or patches will show up when you set it with powder. The sponge slightly sheers out the coverage and thus it looks very natural (unlike in the picture).
Next, I use a fluffy blending brush from Colorbar and dusted the Lakme Rose Powder on top. Lakme Rose Powder suits my skin very well and is also inexpensive. I didn't bake or anything but merely set it to apply the eye makeup.
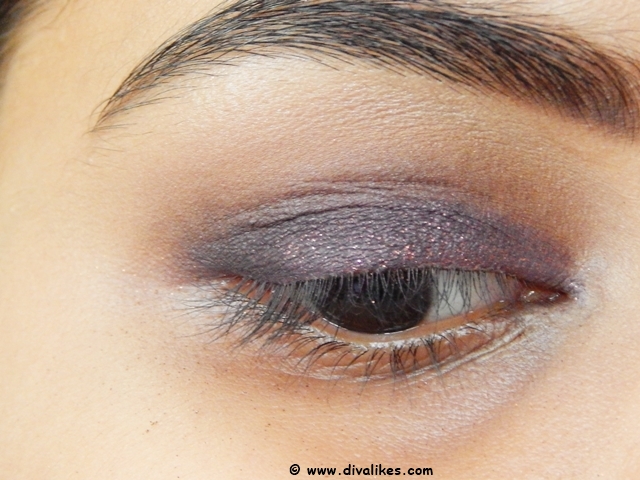
I have now finished off the eye makeup on the eyelids and did my eyebrows as well. You might see a ton of fallouts under my eyes and that is why I didn't do anything for under eyes till now.
Next, I took a water based eye makeup cleanser on a cotton ball and swiped under the eyes to clean the fallouts and also remove any layer of residual makeup or dirt.
With the help of my fingers, I applied a tiny mixture of eye cream and glycerin and pat well for the skin to absorb. I gave it a rest for few minutes and started working on it again.
I picked up the Kryolan Dermacolor Camouflage Crème which is the orange-peach corrector for my skin. This one works like a charm with fingers, sponge or even brush. First I applied with fingers and patted well. I applied a little extra for concealing the darkness around my eyes as they are extremely bluish-purple in color.
To sheer out the excess color corrector I applied in the previous step, I used the damp blender sponge to lightly dab to blend it all.
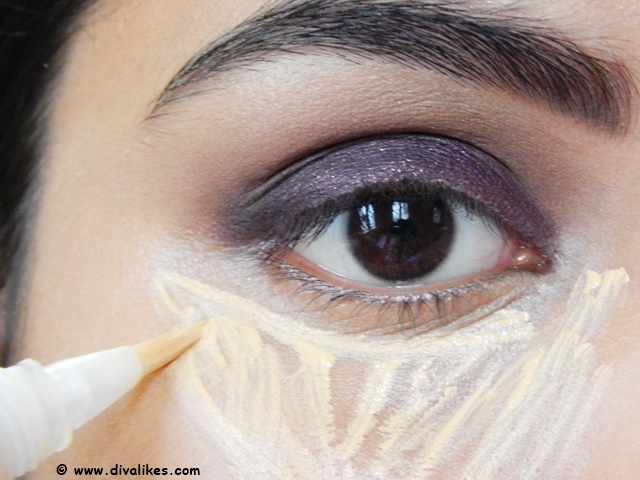
Once I am done with corrector, I applied the concealer. Now, my skin tone is around NC 35 to 40 with strong warm undertones. I wanted to brighten up the under eyes and no concealer could do that for me. Then I used the L.A. Girl Cosmetics PRO Conceal HD Concealer Yellow Corrector as a concealer to conceal and highlight. This has pale yellow undertone and with the peach corrector underneath it turns out super awesome. If you don't have a yellow concealer, I would suggest going for a yellow setting powder like Ben Nye Banana Powder or The Sacha Buttercup Powder.
To get the maximum brightness, I pat and spread the concealer with my finger. I let it remain for 30-50 seconds to have it semi-dry.
Next, I blend it with the damp sponge to even out everything.
Lastly, I sip my damp sponge onto the Lakme Rose Powder and apply a thick layer under the eyes. The Lakme Rose Powder has a pinkish undertone which smoothly cancels out too much yellowness and gives a brightened look. The damp sponge thing I learned from the tutorials of Mario Dedivanovic (Kim K's makeup artist) and this surely works like a dream.
That's the finished look with the complete eye makeup.
Tips To Remember:
Okay, I know a 14-point concealer tutorial is something extreme and looks exaggerating but once you get the hang of it, it will be a lot easier with time. Concealing eyes (excluding eye makeup) takes around 10-15 minutes in general, so this is real quick. All you have to do is invest in some good products and do it the right way.
Products Used:
I have also listed down the possible and probable dupes of these products.
- L'Oreal Paris White Perfect Magic White Eye Cream (any hydrating cream that works for you)
- Kryolan TV Paint Stick (Dupe - MAC Pro Longwear Paint Pot, Clinique Even Better Concealer, Kryolan Supracolor Makeup Palette)
- Kryolan Dermacolor Camouflage Creme Dupe - (Mac Pro Longwear Concealer, Clinique Even Better Concealer Orange, L.A. Girl Cosmetics PRO Conceal HD Concealer Orange Corrector)
- Lakme Rose Powder (Dupe - Any loose powder will work with a little bit coverage)
- Almon Latex Free Pink Blender Sponge (Dupe - Beauty Blender, Real Techniques Miracle Sponge, PAC Beauty Blender, YBP Sponge, etc.)
- L.A. Girl Cosmetics PRO Conceal HD Concealer Yellow Corrector (Dupe - Inglot AMC Concealer, MAC Studio Finish Concealer and Creamy Concealer Kit - Bobbi Brown)
- Glycerin
Before I start off, I would advise investing in good quality products. Firstly because it will give a nice finish and blended look for the whole day without any disruptions. Secondly, the eye area is sensitive and will cause infection if you don't use quality makeup. And lastly, once you invest, it will last a long time (around 1 year easily) and is surely worth it.
Steps Involved:
I started off with L'Oréal Paris White Perfect Magic White Eye Cream which works well for my eye area, hydrates and plumps up the skin and gives a nice and smooth canvas to work with. Wait for few minutes to let the cream get absorbed. You can also use a drop of glycerin and let it get absorbed. Glycerin helps the makeup to stick to the skin better.
I warmed up the Kryolan TV Paint Stick (exactly my skin tone color) and applied on the eyelids. I patted the cream well and spread all over the lids first.
Next, I used the damp Almon Latex Free Pink Blender Sponge to blend the color well. It is very important to blend in evenly or patches will show up when you set it with powder. The sponge slightly sheers out the coverage and thus it looks very natural (unlike in the picture).
Next, I use a fluffy blending brush from Colorbar and dusted the Lakme Rose Powder on top. Lakme Rose Powder suits my skin very well and is also inexpensive. I didn't bake or anything but merely set it to apply the eye makeup.
I have now finished off the eye makeup on the eyelids and did my eyebrows as well. You might see a ton of fallouts under my eyes and that is why I didn't do anything for under eyes till now.
Next, I took a water based eye makeup cleanser on a cotton ball and swiped under the eyes to clean the fallouts and also remove any layer of residual makeup or dirt.
With the help of my fingers, I applied a tiny mixture of eye cream and glycerin and pat well for the skin to absorb. I gave it a rest for few minutes and started working on it again.
I picked up the Kryolan Dermacolor Camouflage Crème which is the orange-peach corrector for my skin. This one works like a charm with fingers, sponge or even brush. First I applied with fingers and patted well. I applied a little extra for concealing the darkness around my eyes as they are extremely bluish-purple in color.
To sheer out the excess color corrector I applied in the previous step, I used the damp blender sponge to lightly dab to blend it all.
Once I am done with corrector, I applied the concealer. Now, my skin tone is around NC 35 to 40 with strong warm undertones. I wanted to brighten up the under eyes and no concealer could do that for me. Then I used the L.A. Girl Cosmetics PRO Conceal HD Concealer Yellow Corrector as a concealer to conceal and highlight. This has pale yellow undertone and with the peach corrector underneath it turns out super awesome. If you don't have a yellow concealer, I would suggest going for a yellow setting powder like Ben Nye Banana Powder or The Sacha Buttercup Powder.
To get the maximum brightness, I pat and spread the concealer with my finger. I let it remain for 30-50 seconds to have it semi-dry.
Next, I blend it with the damp sponge to even out everything.
Lastly, I sip my damp sponge onto the Lakme Rose Powder and apply a thick layer under the eyes. The Lakme Rose Powder has a pinkish undertone which smoothly cancels out too much yellowness and gives a brightened look. The damp sponge thing I learned from the tutorials of Mario Dedivanovic (Kim K's makeup artist) and this surely works like a dream.
That's the finished look with the complete eye makeup.
Tips To Remember:
- Use the softest brushes or a damp latex free sponge while blending anything.
- Instead of dragging the skin, always use the patting motion to blend.
- Always remember the rule of base makeup while doing eyes – color corrector, then foundation and then concealer.
- To avoid cakey look, use a cream underneath.
- Once you have applied powder, do not go back and apply anything creamy or liquid. This would be a disaster.
- Avoid layering too many concealers and it would be better to skip applying too much foundation underneath when you will be using concealer.
Okay, I know a 14-point concealer tutorial is something extreme and looks exaggerating but once you get the hang of it, it will be a lot easier with time. Concealing eyes (excluding eye makeup) takes around 10-15 minutes in general, so this is real quick. All you have to do is invest in some good products and do it the right way.


